Exam Project Blog

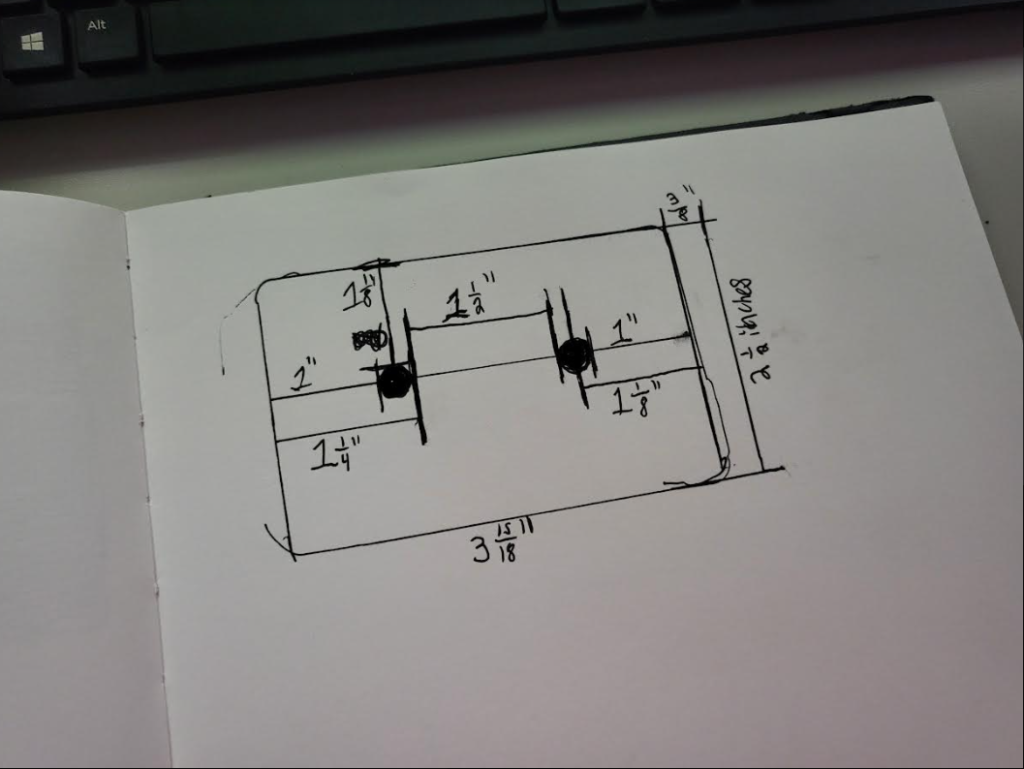
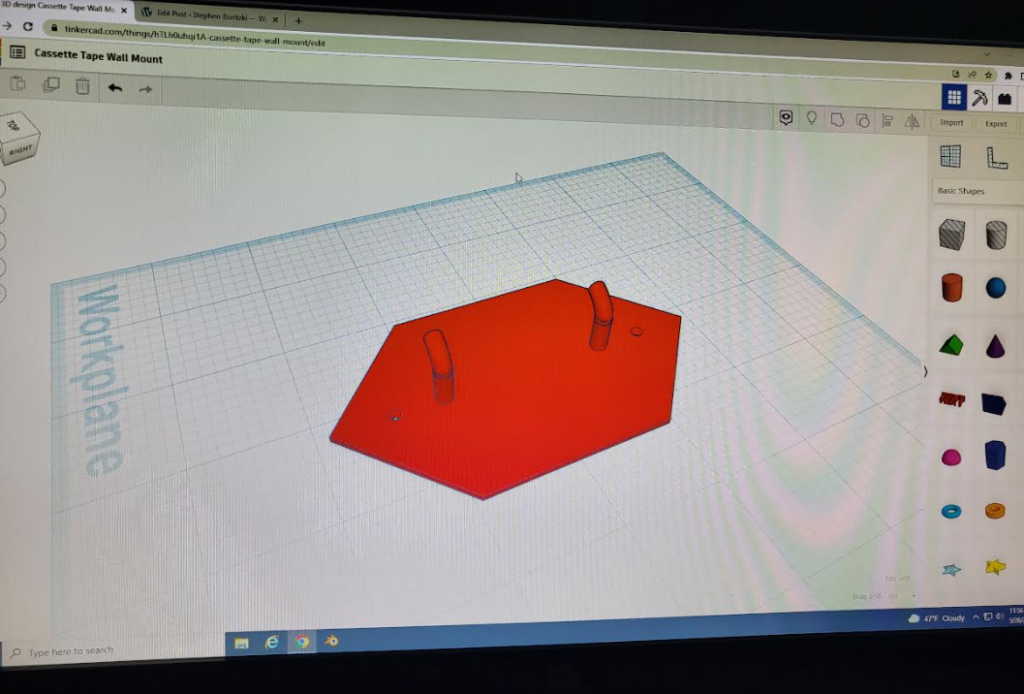
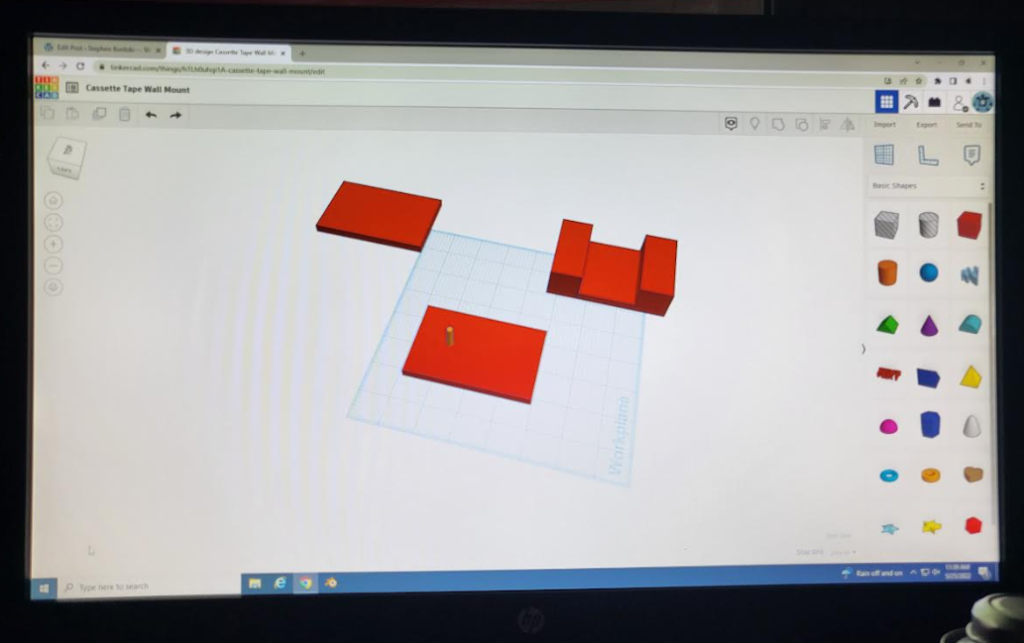
For this project, I had decided to create a wall mount for a cassette tape. I first decided to get exact measurements, and then headed into Tinkercad, where I ruled out everything perfectly within the application. This is one of the first times I have ever gotten exact measurements for a project like this. Typically, I don’t need to get measurements, but I did this time, and it was the first thing I did.
The skills I portray within this project, are skills such as knowing how to use the 3d printer (get it started it, warm it up, load the files, and print), having a better understanding of the application Cura, and being able to properly navigate and understand the application Tinkercad. The skills required to do this project are 3d modeling and designing, file transferring within Cura and out, and understanding how to use and navigate the 3d printers.
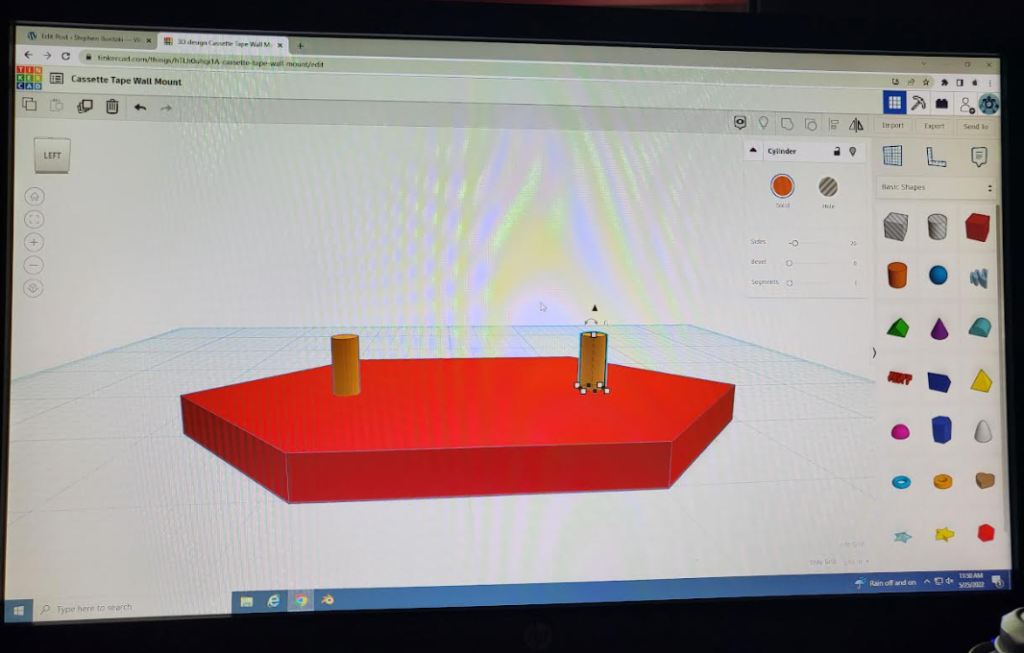
I had learned the skills I needed by spending abundant amounts of time working within these different applications. If someone wanted to learn these skills themselves, and try to attempt this project, I would recommend spending some time within Tinkercad, Cura, and in navigating the 3d printers, and to watch some tutorials on how everything works.

https://www.youtube.com/watch?v=gOs6Mdj7y_4

I would use this link, as it would guide you through how to use Tinkercad from start, and give you some very good insight on how everything works.

https://www.youtube.com/watch?v=eUNTlb5pEWA

I would use this link, as it would help you understand the application Cura, and show you important tips and give you good pointers while using the app.

The project went very well. Everything seemed to fit nicely, and minimal edits were made to create what I needed.

If I had the time, I would certainly continue this project. This exam project has been a lot of fun, and I would love to continue to create more 3d printed objects related to what I made. These would be things such as tape reels, and cassette tape holders/stands.


Write a final paragraph about your experience in Science for Inventors. What things did you enjoy about the class? If we continue to offer the class, how would it be made better? Make at least one constructive suggestion about an improvement for the class.

My experience in this Science For Inventors class, has been quite a wonderful and enjoyable one. I really enjoyed being able to have a lot of time to complete projects, and having the ability to hang, create, and design with my friends, all at the same time. If this class were continued to be offered, one suggestion I would make is to deplete the lesson plans for forcing us to learn how to write code for V.R., and to create more lesson plans for us in the certain fields we work in (fields such as 3d printing, V.R., and laser shows).
2nd Blog Post for 3rd Quarter

Since my last post, I have given my model legs, as well the addition of a pair of shoes, a nice hat, a pair of eyes, and some pretty rad glasses.

This image has an empty alt attribute; its file name is image-2-1024x576.png
(Here is an image of the shoes I added. They look very nice)

It looks much better than what I had done and completed in the last post, and is coming out to look very nice.

(Here is an image of the cool hat and glasses I added to my model. You can also see my models eyes. I am very happy with the outcome)

By March 25th, I would like to have my 3D model completed, and my story finished for my project. I already have my idea ready for the story, I just need to get that idea written out.

This image has an empty alt attribute; its file name is image-1-1024x576.png
(This is how my model currently looks. In this image, you can see the legs that I had added, as well as the shoes, hat, eyes, and glasses)

Post 5 – Introduction to my Third Quarter Project

Throughout this marking period, I have been learning how to use Blender and its many features within. The application Blender, allows me to create 3d objects such as characters, models, and things that are more life-like (such as trees, plants, animals, humans, and many other living creatures) in a way that adds more of a soft-looking characteristic to it like a cartoon or a modern-day animated tv show. The reason I chose to work with Blender, is because everything within the application is layed out in a simple and orderly manner, and it is fairly quick, easy, and fairly accessible to work with.

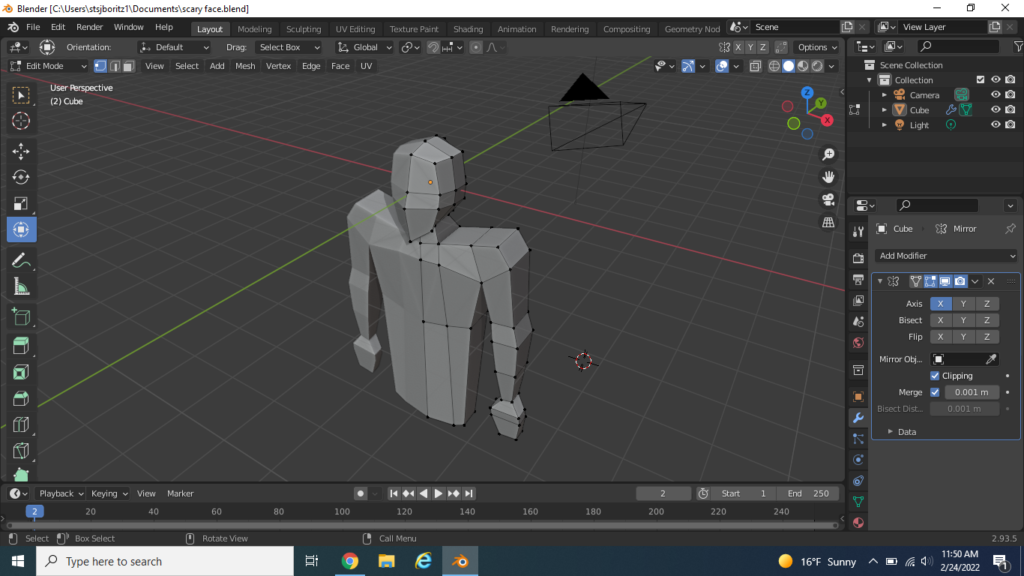
(This is the model I have been creating. Its a low poly model of a human. You can see what I mean when I say it has a cartoon look to it. It is very basic and doesn’t really have any fine detail, which is what gives it this cartoon look)

Throughout the past 3 weeks, I have come pretty far in the making of a 3d model of a character. I have learned many new things within Blender, such as mirroring objects, extruding sides, forming and deforming shapes, and many other little things similar too. I have been watching YouTube tutorials on how to create such 3d models, and have been expanding on what I’ve learned from those videos to create my 3d model.

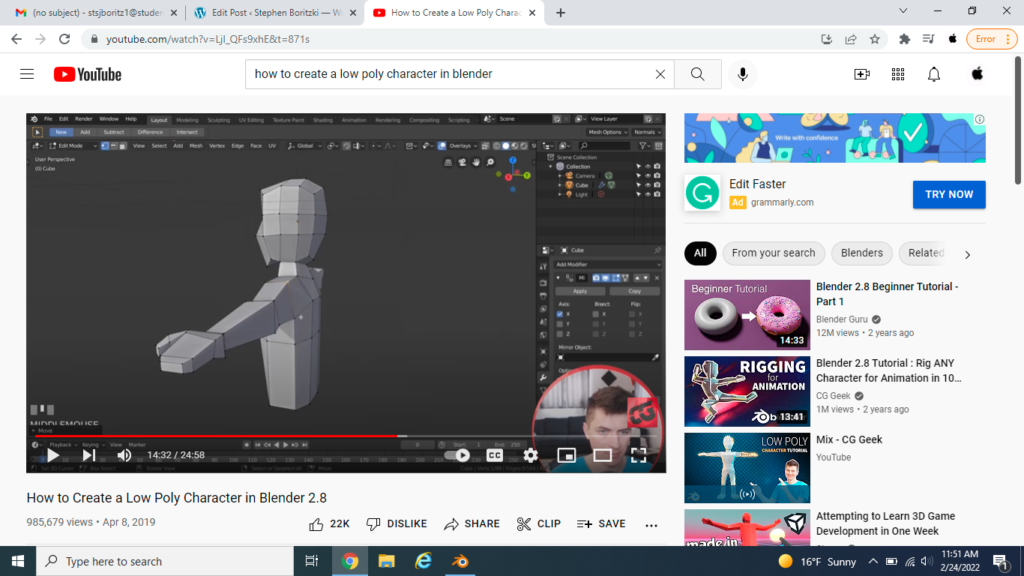
(This is the YouTube video I had used to create most of my Low-Poly character)

I am writing a story about a scientist whose name is Ginger Winger. Ginger is going to be working on a portal, which would lead to another dimension (which come to find out is the digital dimension). He isn’t sure what would happen if he entered the portal, but he still takes the risk and enters in, and he is brought to the digital dimension in which there is nothing in the existing universe except him, the x,y, and z-axis, and an endless plane. He is the model in the digital dimension.

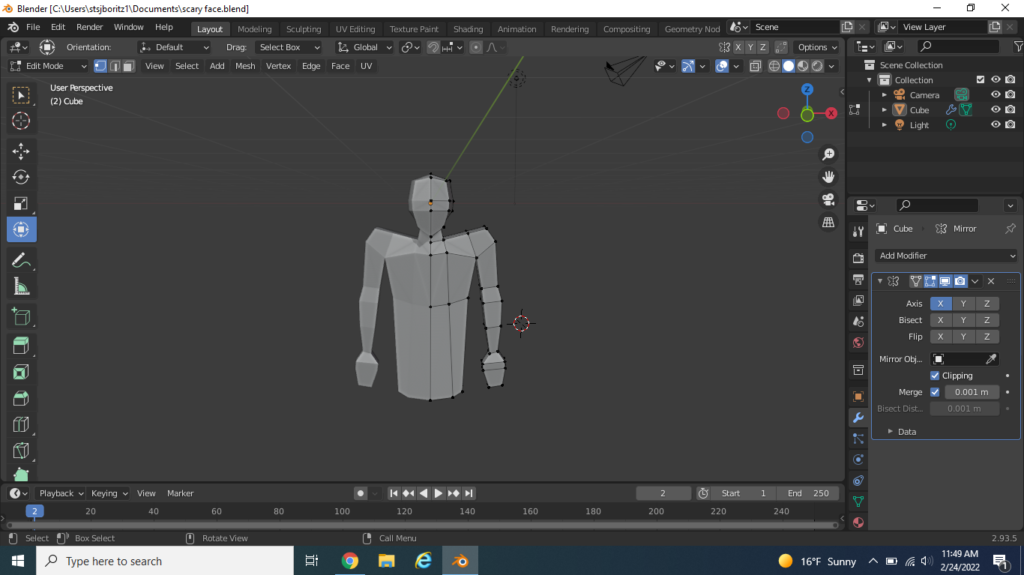
I still need to finish the model by adding legs and shoes, and I would still need to write a short story somewhere. I am hoping to accomplish both of these tasks in this upcoming week, as well as in the week immediately proceeding.

(The model of Ginger, and as we can see I still need to complete the legs and shoes)

A mini action figure for a young child that is of age 5-10

Explain what you chose to make for your exam project and why you chose it.

When Devin and I had started looking into what we wanted to make for our Exam, we had been already working on a 3D model of a face within Blender. So, when we were given our 2 Exam projects to choose from, we both knew that making a toy action figure for a child between the age of 5-10 would be the perfect project since we had already been designing faces.

(Here is a screenshot of the face model we had been working on before starting on the Exam)


Talk about 2 specific challenges you faced and how you overcame them.

Whilst Devin and I were working, we had come across 2 prominent challenges, of which being; exporting Tinkercad STL. files from my computer and sending them to the computer Devin was using in our SFI class, and being able to take simple/basic and sharp (mainly unrefined) Tinkercad shapes and turn them into smooth parts of the 3D action figure model.

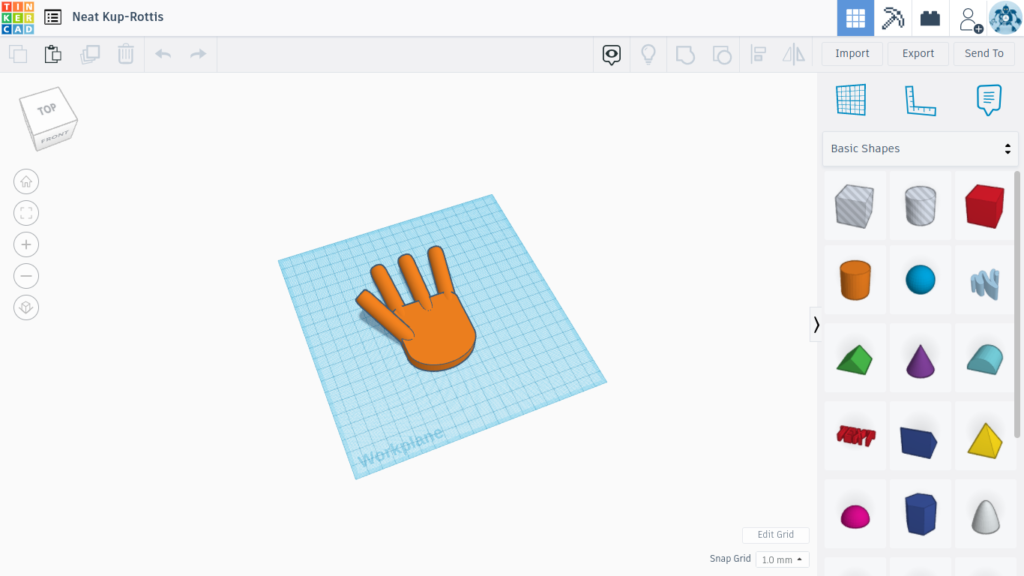
(Here is a good example of a basic model. There are sharp edges and nothing meshes correctly)

To overcome the first issue (which was exporting Tinkercad STL. files from my computer and sending them to the computer Devin was using in our SFI class), I had come to realize that Gmail is capable of downloading and sending STL. files to other people without any issues. So, of course, I had Gmailed Devin the Tinkercad files, which now leads us into our second issue which was being able to take simple/basic and sharp (mainly unrefined) Tinkercad shapes and turn them into smooth parts of the 3D action figure model. The problem was that since the files were fairly basic after I completed them, they had a very unrefined look to them (which is the result of sharp edges and basic 3D models/shapes). We had overcome this challenge by taking the models within Blender, subdividing them immensely, and using the sculpt mode to shape and contour each object. This made the models more realistic, and had overcome the “basic shape” problem we had encountered.


What was your favorite part of this design? Why did you enjoy that part.

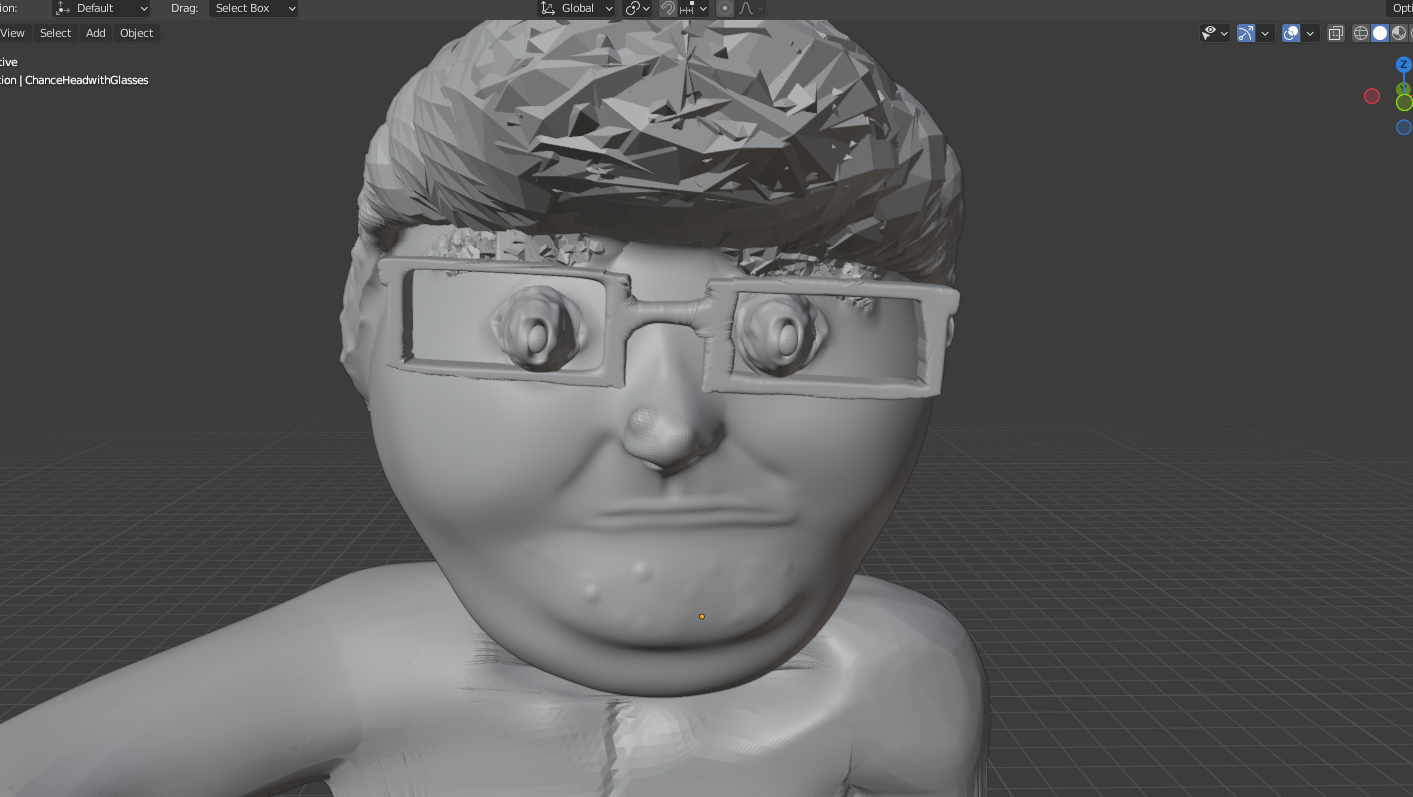
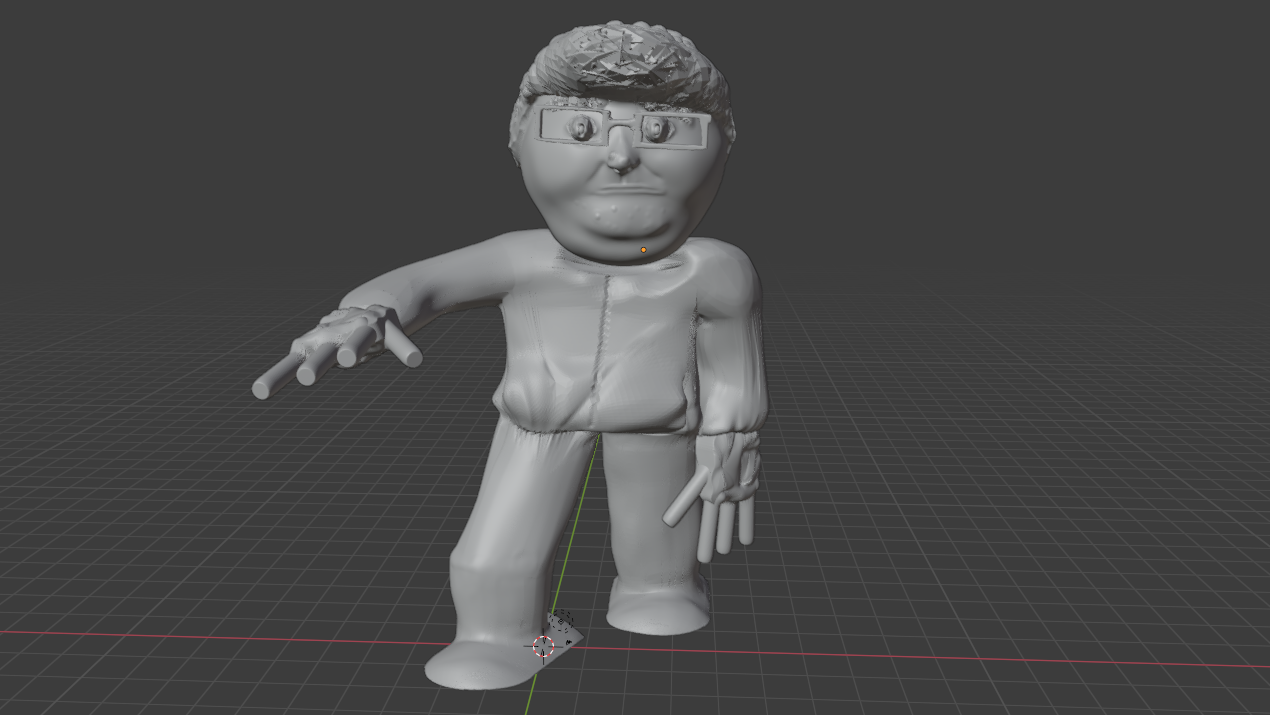
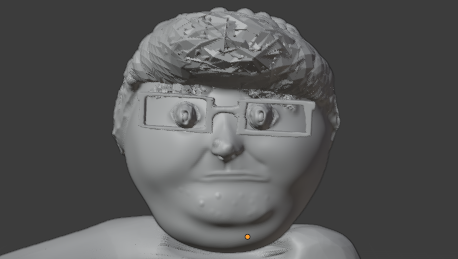
Personally, I enjoy every part of this design as it is very cool and unique, but I will say that the face is the most detailed part of the whole model. So, that being said, I would have to say that the face is my favorite part, due to the amount of time and quality design work that was put into it.

(Above is an image of the full completed model. Below, I have zoomed in on the face, and you can clearly see how detailed the face is)


What program did you choose to use for design? Talk about how your skills have changed this semester.

We had used both Blender and Tinkercad, as I was more proficient on Tinkercad, and Devin was more proficient on Blender. Even though I had more experience on Tinkercad, I have definitely learned a lot about Blender and even worked on half the project there myself. I started off not knowing anything about Blender, but over time have gained many skills such as merging, meshing, subdividing, sculpting, duplicating, and many more in-depth skills.


Show at least 3 pictures that support your blog. Caption the pictures explaining what they show. You should mix them in with your writing to break it up for the reader, rather than just pasting them at the end.

Here is the link to the google slides presentation which contain the screenshots/photos for the model within Cura, Blender, and Tinkercad:

https://docs.google.com/presentation/d/1dowsPxyIbIDVnvvZuGfqRNet4Z7pDQpGjxh_snTUKSI/edit#slide=id.p

My Choice Project Semester 1

The project I have been working on is supposed to be a goofy model of one of my friends. Devin and I have been working on the project together in Blender as well as Tinkercad, to help us get the desired look we want. The reason we chose this project, is because it’s something we can work on together, and we can learn new things and overcome obstacles together. Devin has some prior knowledge of Blender, and I have some prior knowledge of Tinkercad.

Throughout this project, we’ve learned how to import STL. files into Blender, turn the project inside blender into an STL. file, and how to merge/group 2 or more objects together within Blender. The fact that we can import and export STL. files in Blender, allows us to expand our creativity and makes things a lot easier in terms of designing and 3d printing.

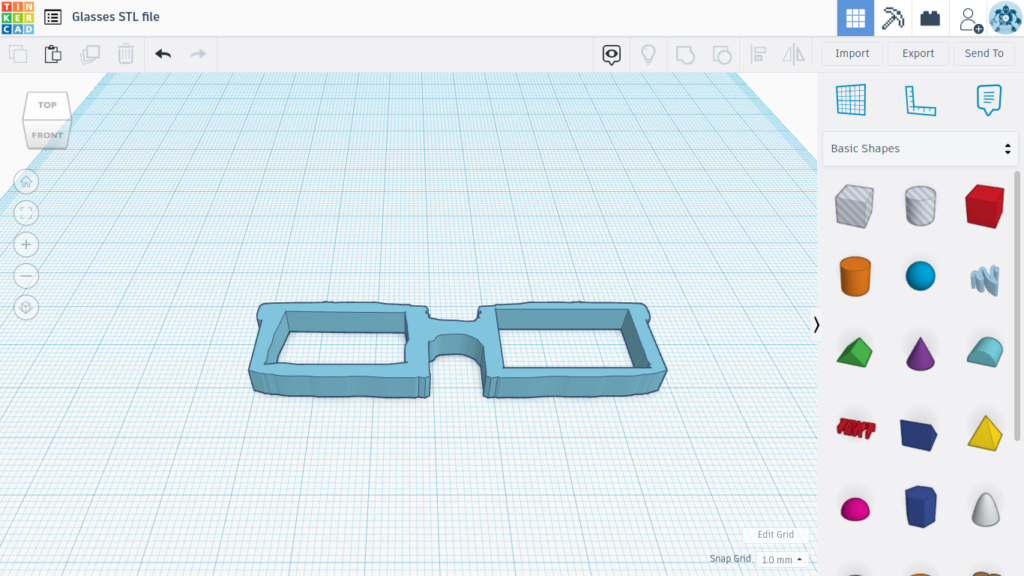
(Above is the STL. file for the glasses within Tinkercad, before being transferred into Blender)(Below is the file transferred into Blender)
Screenshot (2).png

2 obstacles Devin and I have encountered working throughout this project were being able to group/combine 2 or more objects together within Blender, and the size as well as the location of the Tinkercad models after being imported inside of Blender. We had figured out how to combine/group objects together by doing some research and trying it out for ourselves on the project by combing two object files together. For the second problem, we had tackled the small issue of size and location by either scrolling in or out to find the object, and would have to reposition and bring the object down to scale within our project to allow us to complete our goals.

Next, we are going to complete and finish making the file, and will use it for our final exam project, where we are going to create an action figure out of it. We would definitely like to continue this project, which is even why we are using it for our final exam project, which again, is the kid’s toy mini action figure.

Screenshot (5).png
(This is the completed file within Cura. We can now use this model as a start for the mini action figure we are going to make for the final exam project)

Holiday Ornament Project

My idea for the holiday Christmas ornament project was to create something that involved an accordion. I wasn’t sure how I wanted to go about this at first, but I eventually decided to go with a classic vintage indent-styled Christmas ornament with the accordion resting within the indent.

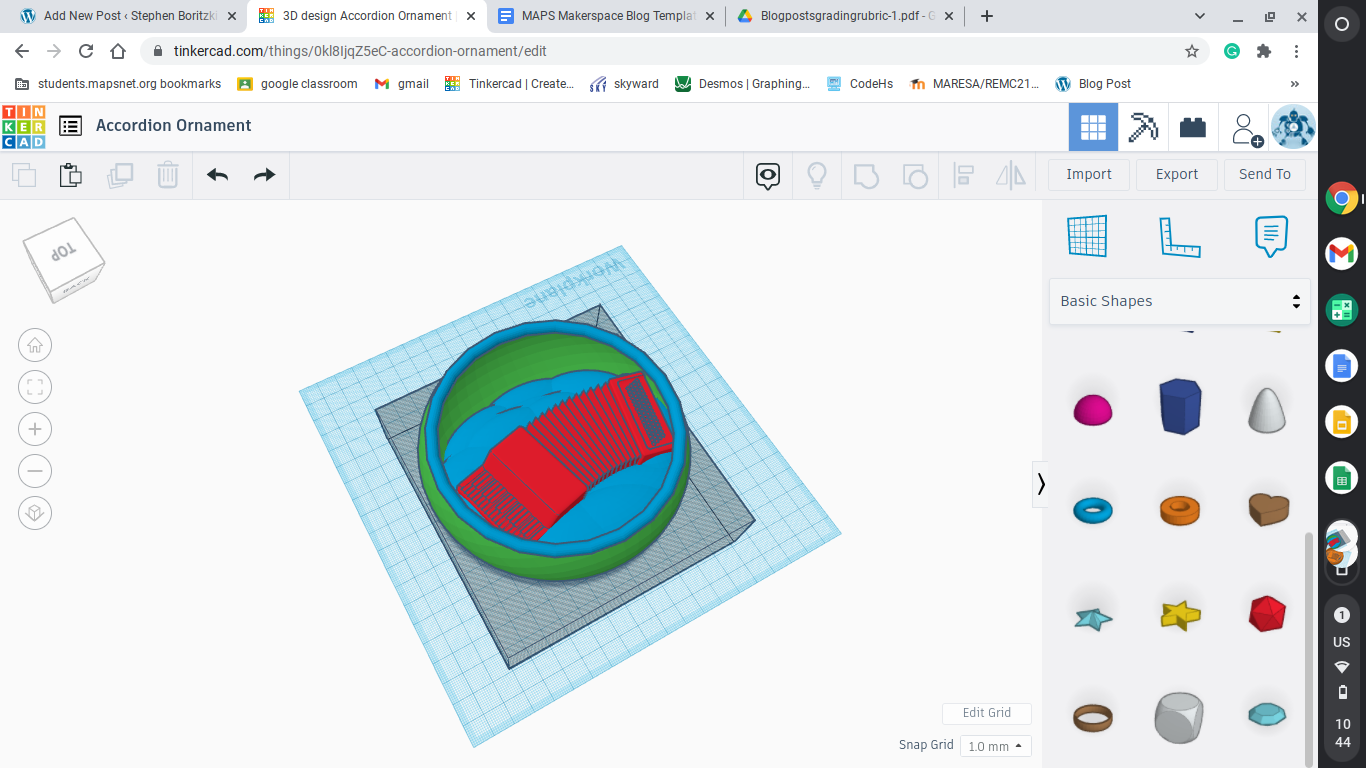
To start my project off, I went with making the accordion first. I used the basic square shape, and within the setting of the shape, I increased the radius to remove the sharp square edges, and make them more round. I then combined these rounded square shapes to create the front and back of the accordion.\

I then took another square and increased the radius a little bit to give a somewhat curved edge for the keys. I didn’t want the keys to be too round, but I also didn’t want them to be too straight either, so I made it right in between. I then duplicated that same shape to create the keys.

After that, I created the bellows. I was trying to think of a way to make them look as good as possible, and found that just regular triangles work perfectly. I made them all of the same size and duplicated them at an angle repeatedly, and it came out with the perfect bellows for my accordion.

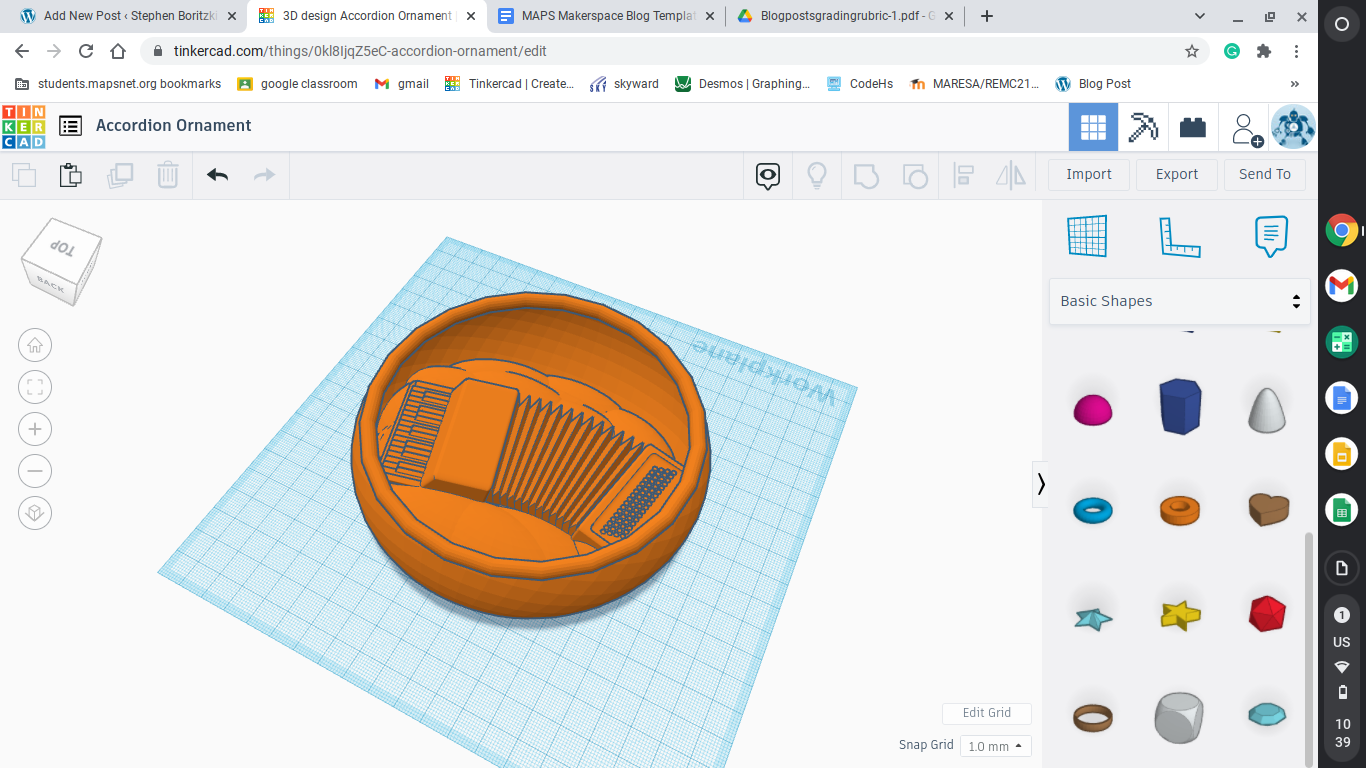
Next was to complete the indented ornament. I took a circle, duplicated it, shrunk it down a little, and erased that smaller circle from the larger one. I then created clouds out of circles and placed them so that when I put the accordion inside, it would look like it was floating on the clouds. After I grouped those, I took a torus and made it fit the top/front of the accordion ornament perfectly, so that there would be no sharp edge from the circle cut-out base.

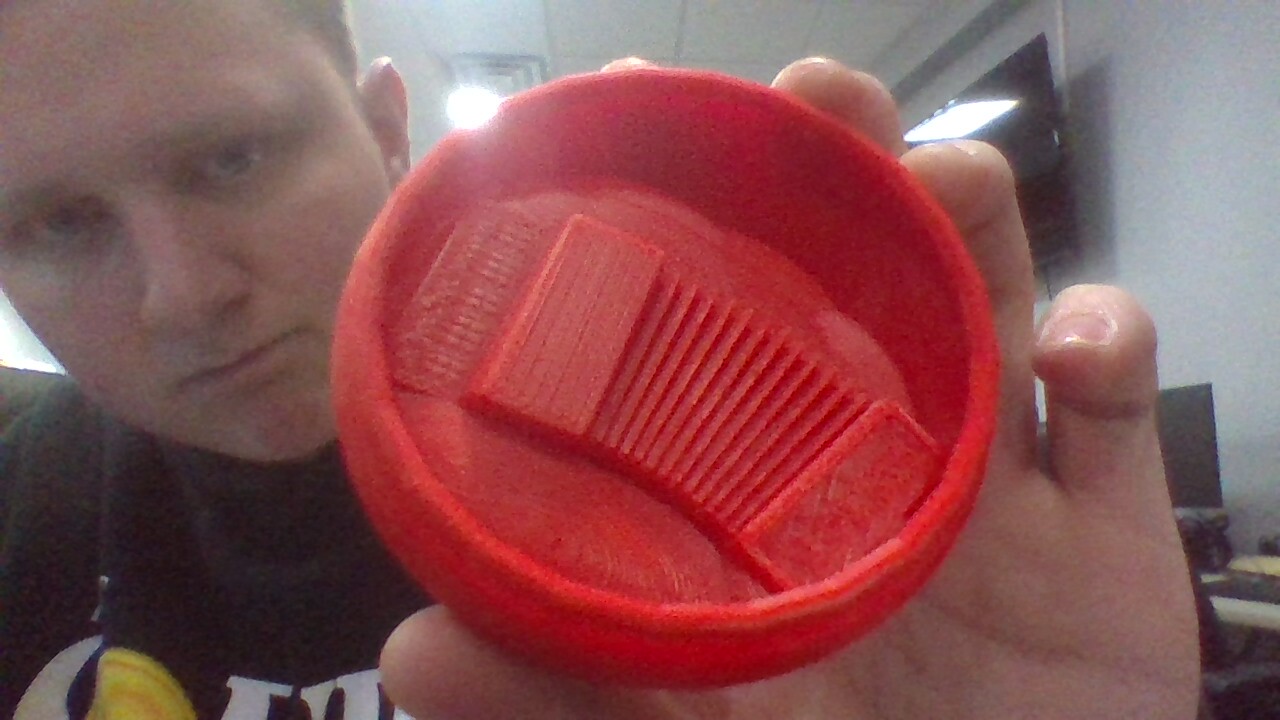
I then combined everything and had the ornament I was looking for. Below are pictures of the ornament file with the different pieces that are being grouped together, the finished ornament file, and a picture of the finished printed project.

To conclude, creating this accordion ornament took a lot of work and time, and within that time I had some things come out perfectly, like for instance, the accordion bellows being only made of triangles, or the accordion keys being a perfect size so that once I duplicated enough for the whole keyboard, they fit perfectly within the base they sat in with equal spacing, and the fact that everything fit together so perfectly. I am honestly really happy with the outcome of what I created, and the only thing I saw that was bothersome, was adding a hold for the wire to go through to hang on the tree. I didnt want to add a hole because I needed the ornament to be perfectly balanced, and I wouldn’t know where to place it if I don’t have the ornament printed and tested to find its balance point. I will be able to fix this issue in upcoming weeks with just general practice, as the more I print, the easier it will be to guess where the balance point would be on an object. Other than that, I am completely satisfied with the outcome of what I have created.

Introduction

Hello, my name is Stephen, I am in 12th grade, and my plan after high school is to get a master’s in some type of engineering field at Michigan Tech. The reason I took this Science For Inventors class, is to help improve my 3d designing skills, as well as learn how to properly use a 3d printer and know what to do when something goes wrong. I am looking forward to finding, creating, designing, and printing my own things on the 3d printers. Two of my strengths are 1) designing in Tinkercad, and 2) having some experience with Cura. Having these skills will help me greatly when I go to 3d print things, as I will need less help with the more basic things, and will gain more experience with the newer things. One of the personal projects I am interested in working on this year is creating a fully working 3d printed mechanical wall clock. I feel as though the biggest challenge in this class will be learning the tolerances with 3d printing, and trying to make the 3d printed wall clock keep accurate time.